
Departments
The Departments section of the admin portal lists all the departments in your group. Departments represent subsets of users within a group and users represent individuals within a group or department. Creating departments allows you to create a department administrator. With this feature, those specific department administrators can then control a small subset of users.
As a group admin, you can add, modify or remove departments, as needed. This guide reviews those steps.
Add a Department
- From the group dashboard, select Departments from the left-hand menu.
- Here you will see a list of departments assigned to this group/location. To add a department, select the Plus icon.
- Enter the Name of the department.
- If applicable, enter the Parent of the department.
- Enter the Calling Line ID Name (CLID).
- If applicable, assign the department a phone number in the CLID Number field.
- Select Save to save your changes and add the department.

Click image for large view

Click image for large view

Click image for large view
Modify a Department
Once the department is created, you can modify the setting at any time. You can also add an administrator to the department, once created.
- From the departments page, select the department you would like to modify.
- Select the Settings icon in the upper, right-hand corner.
- The Edit Department pop-up will appear. Modify the areas needed and select Save to save your changes.
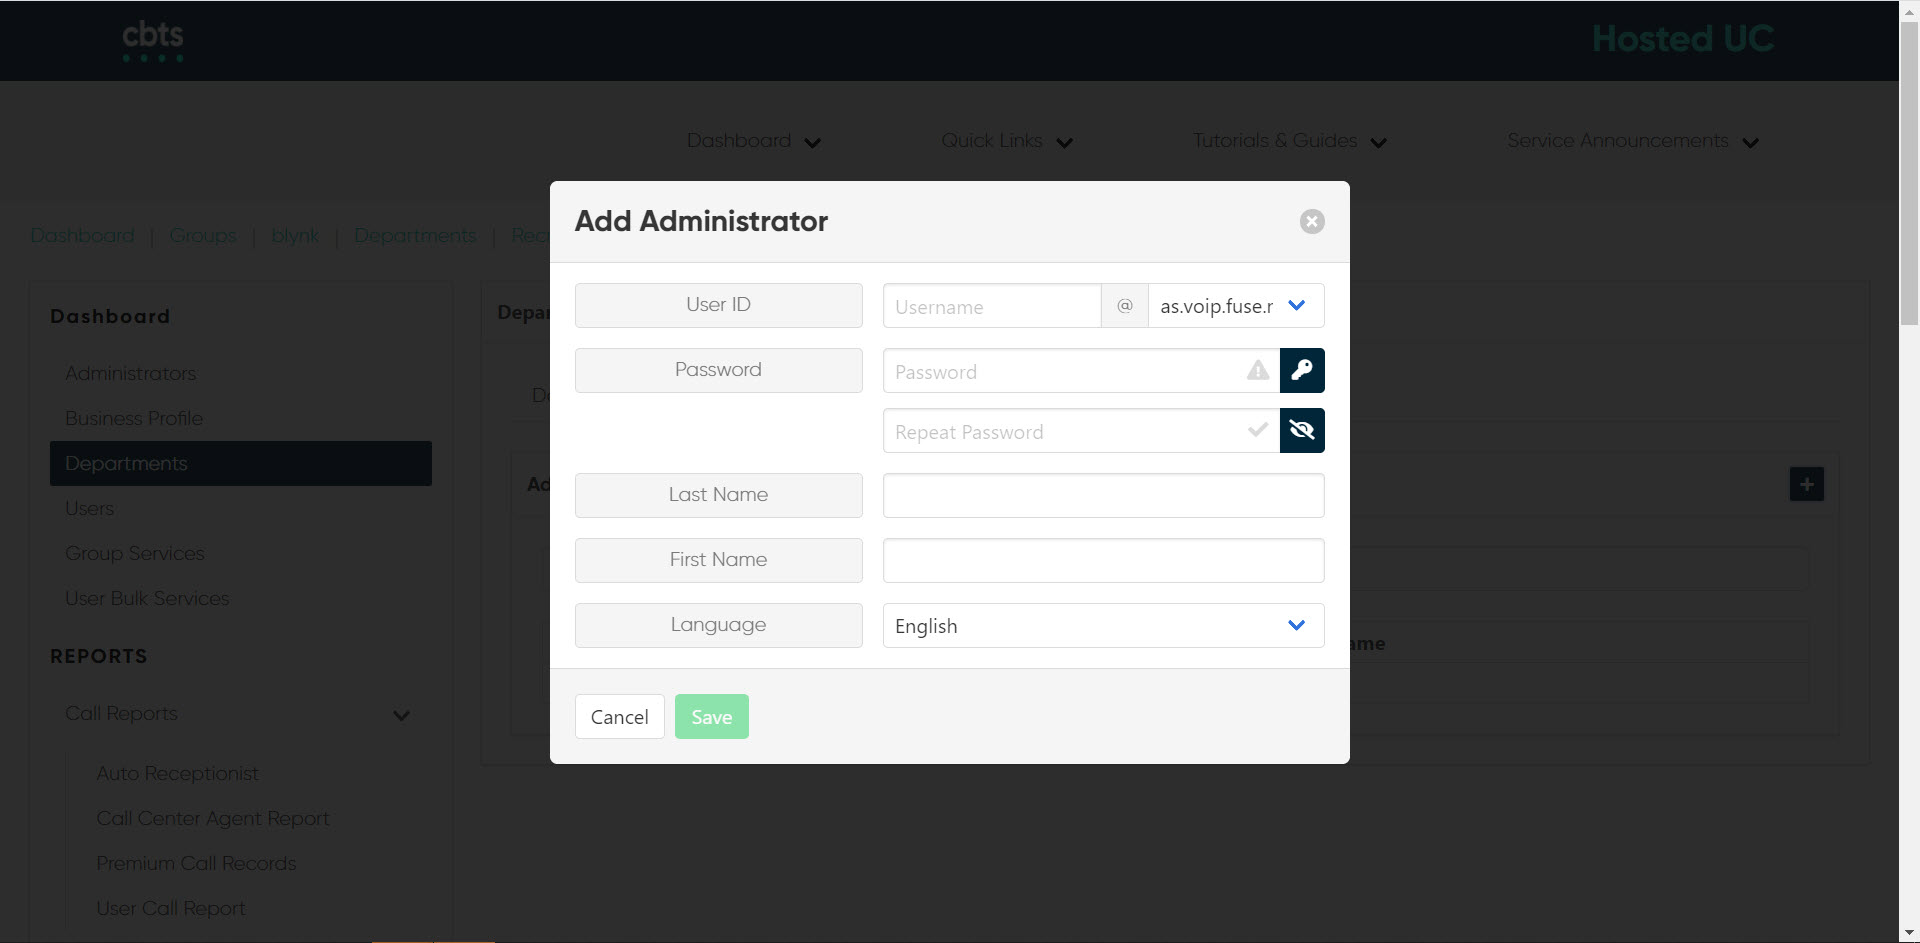
- To add an administrator to a department, select the Admin tab.
- Select the Plus icon.
- Enter the User ID and Password for the administrator.
- Enter the Last Name, First Name and Language.
- Select Save to save your changes and add the department admin.

Click image for large view

Click image for large view

Click image for large view
Click image for large view
Delete a Department
- From the departments page, select the department you would like to remove.
- Select the Settings icon in the upper, right-hand corner.
- The Edit Department pop-up will appear. Select Delete to remove the department. You will be prompted to confirm.

Click image for large view