Introduction
Call Forwarding Selective allows you to forward specific calls matching your pre-defined criteria to a different phone number. This criterion can be a list of up to 12 phone numbers, a specified time schedule, or a specified holiday schedule. All criteria for an entry must be satisfied for the call to be forwarded (phone number/day of the week/time of day). If the call is not forwarded, the call continues as if this service was not turned on.
Call Forwarding Selective
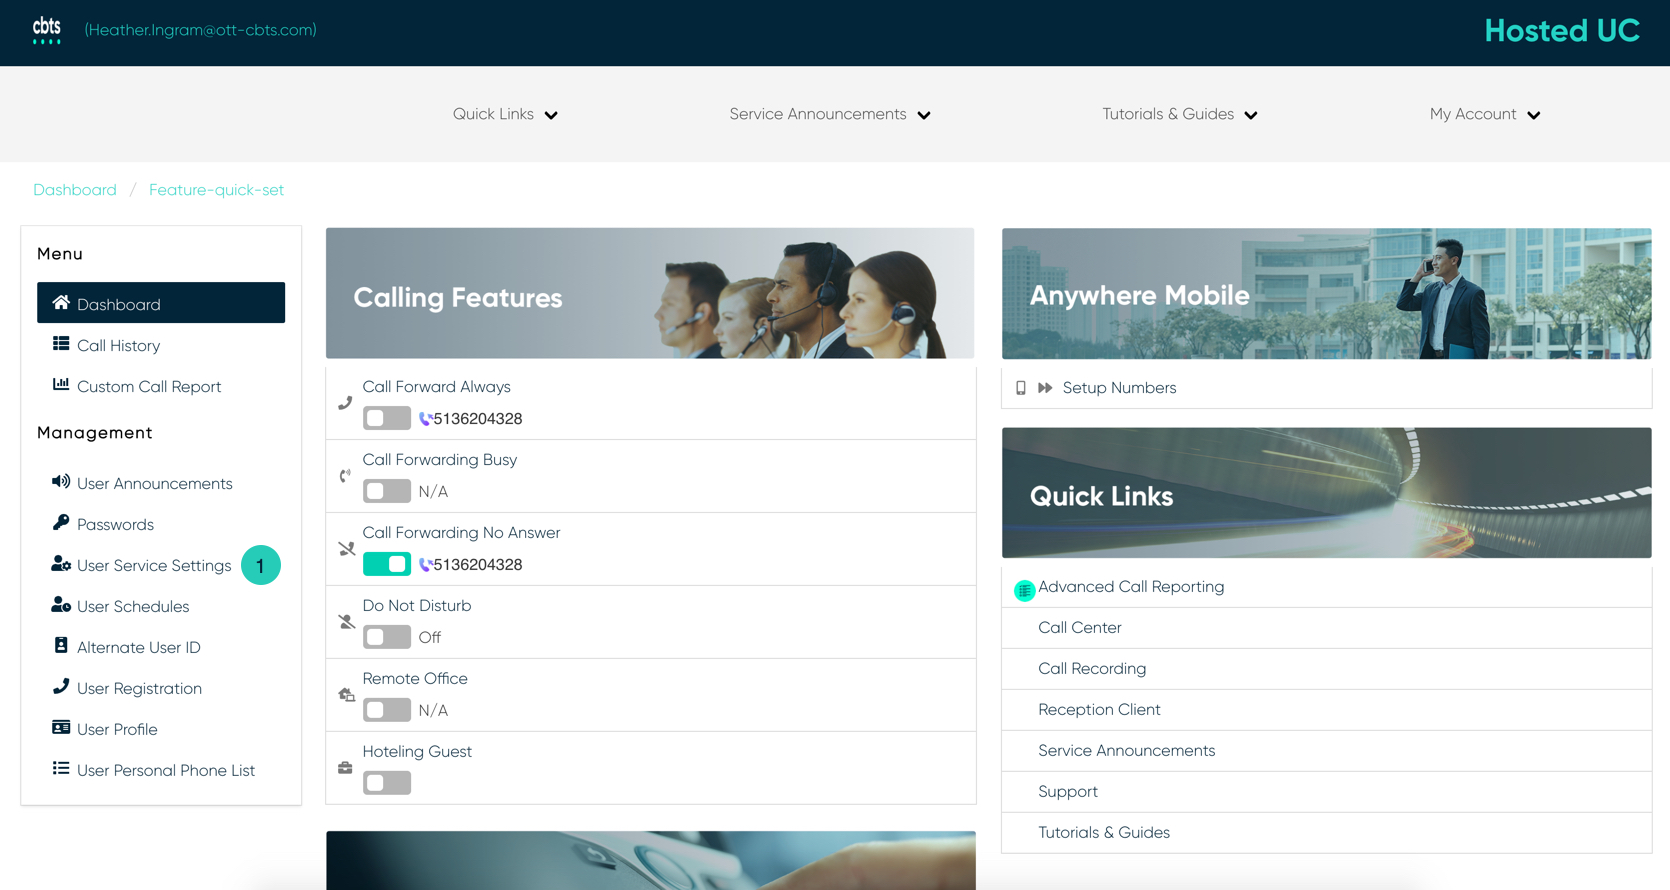
- From the user dashboard, locate and click on User Service Settings.
- The Services page will appear.
- Proceed to locate and click on Call Forward Selective. This will give you access to the Call Forwarding Selective configuration page.
To Configure Call Forwarding Selective:
- Click on the Settings icon within the Call Forwarding table.
- Proceed to check the checkbox next to Activate Call Forwarding Selective to enable this feature.
- Ring Reminder will cause your phone to do a half-ring when a call comes in. It is not intended to allow you to answer it, but to remind you of your calls are being forwarded. To enable this setting, check the Ring Reminder box.
- Then enter a valid 10-digit default forward to number.
- Click Save when finished.
Adding Criteria
Criteria allow you to apply specific call settings at different times of the day or week.
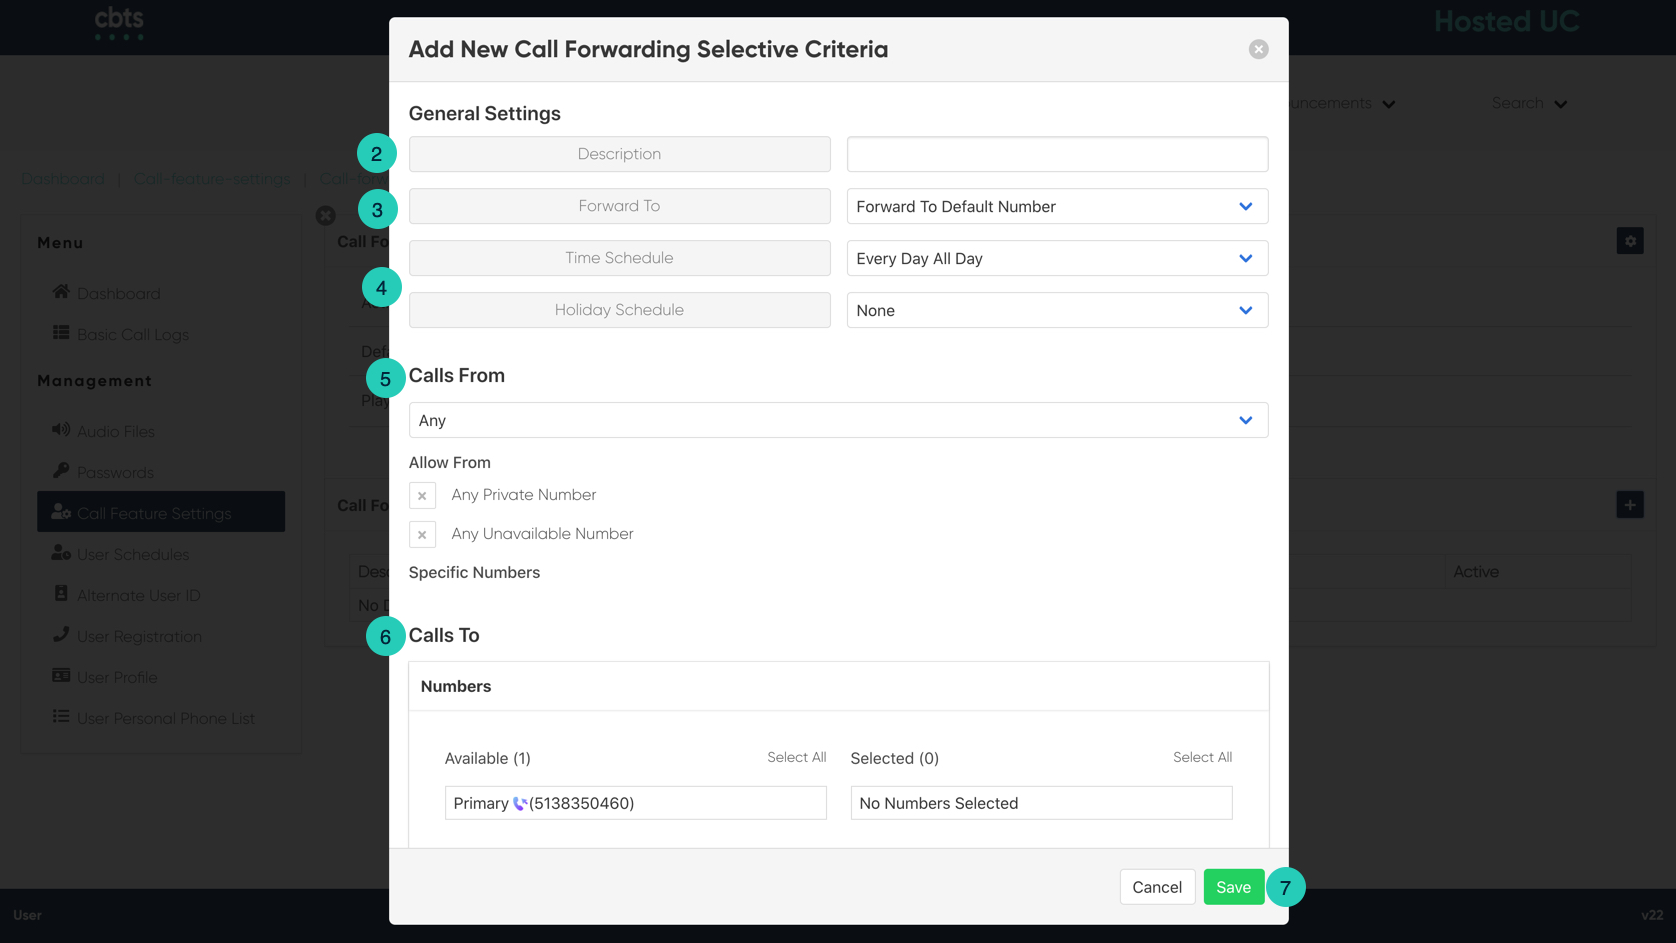
- From the Call Forwarding Selective page, click the Settings icon within the criteria table.
- Proceed to enter a name for the criteria you want to impose.
- From the Drop-down menu, select the appropriate Forward To a number.
-
Next, select the Time and Holiday Schedules. Under Time
Schedules, you have the following items to choose from. From the Drop-down
menu:
- Every Day All Day
- User-Created Schedules: these are schedules created by you within the User Schedules tab via the dashboard. To create a schedule, follow the steps within the User Schedules guide.
You also have the option to choose a Holiday Schedule from the Holiday
Schedule drop-down menu.
-
Select where you want to receive calls from. You have the option to choose
one of the following:
- Any Private Numbers
- Any Unavailable Numbers
- Specific Numbers - If choosing this option, use the fields below to enter valid 10-digits numbers.
- Finally, select your Call To number by clicking on the number you wish to choose.
- When complete, click Save. Your criteria are set for this Anywhere Number.


