
Home |
Voice Messaging
Administrators can enable and configure a user’s voice messaging settings and greetings within the admin portal. The voice messaging settings and features allow users to retrieve voice messages by email or text. Voicemails are sent in a .wav format.
Configuring Voice Messaging
- From the group dashboard, select the Users tab in the left-hand navigation. Here you will see a list of users assigned to this group/location.
- Select the user you would like to modify the voice messaging settings for.
- Then select Forward All Calls To Voicemail to modify the voice messaging settings.
- The Edit Voice Messaging window appears.
- Here you can modify the following:
- Enabled - Check this box to enable voice messaging for the user.
- Enabled Phone Message Waiting Indicator - Check this box to enable the message waiting indicator for the user.
- Send Voice Message Notification Email - This option sends a voice message notification to email indicated. If selected, enter the email address to send the notification to in the Email Notification To field.
- Send Carbon Copy Voice Message - This option will send a recording of all voicemails to the email address entered. If selected, enter the email address to send the messages to in the Carbon Copy To field.
- Transfer on Zero - With this option, callers who press ‘0’ are transferred to a specific phone number. If selected, enter the phone number to forward the calls to in the Transfer To field. Note: If this option is selected, make sure the voicemail greeting informs the callers that pressing ‘0’ will transfer them.
- Always Redirect to Voicemail - This option redirects all calls to voicemail.
- Redirect Busy to Voicemail - This option redirects busy calls to voicemail.
- Redirect No Answer to Voicemail - This option redirects calls not answered to voicemail.
 Click image for large view
 Click image for large view
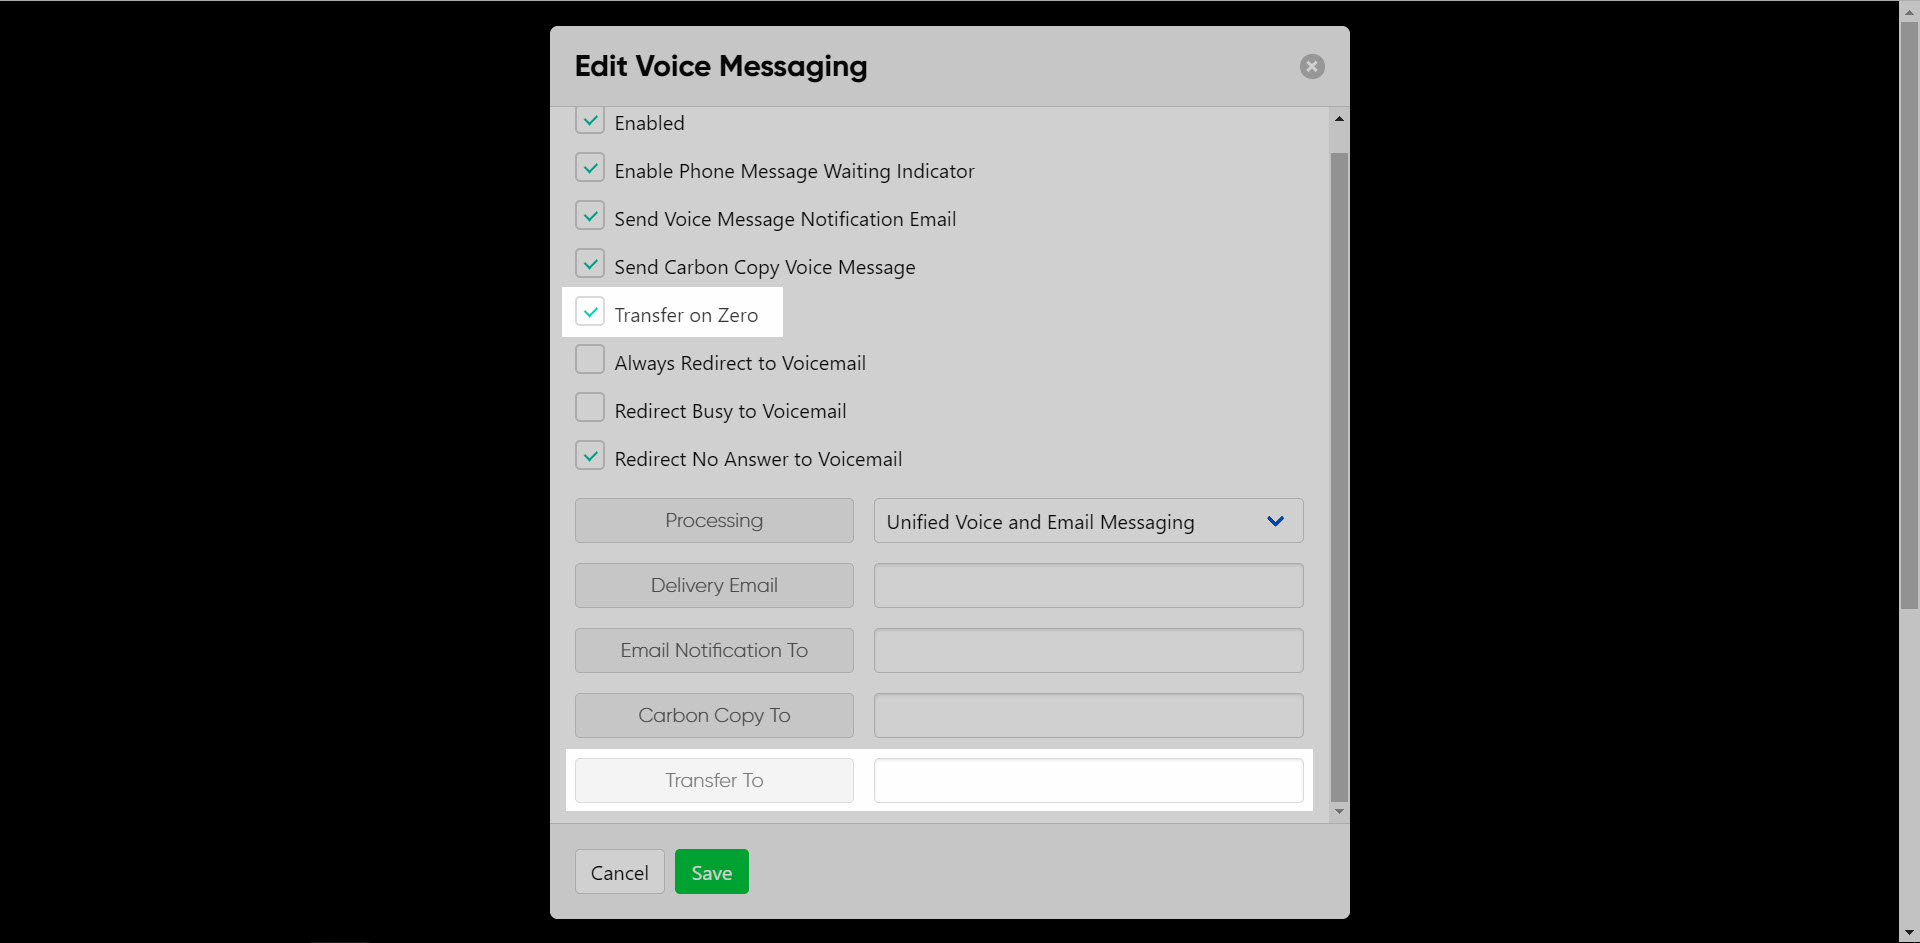 Click image for large view
 - Next, select how you would like the email and carbon copy voice messages to be delivered. Next to Processing, select one of the following options from the drop-down menu:
- Unified Voice and Email Messaging - This option will send the messages to the users Unified Voice client as well as to the email designated below.
- Deliver to Email Address Only - This option will only send to the email address designated below.
- Select the email where you would like the user to receive these messages next to Delivery Email.
- Select Save to save your changes.

Click image for large view

Click image for large view

Click image for large view

Click image for large view