
Introduction
You can create user schedules for various service features that may require them. You have the ability to create regular time schedules or holiday schedules.
User Schedules
- From the user dashboard, locate and click the User Schedules tab in the left-hand navigation bar. The Schedules page will appear.
- You can access all of your created User Schedules here in the Schedules table. To search for a specific schedule, enter the name in the search field and any schedule that resembles that name will automatically start appearing in the table below.
- You can also filter your results using the items to the right of the search bar. You can filter by clicking on All, Holiday, or Time.

Click image for large view

Click image for large view
Adding Schedule
- To add a Schedule, click on the Plus icon. The Edit Settings window will appear.
- Proceed to enter the name of the Schedule.
- Then, select whether it is a Time Schedule or Holiday Schedule from the drop-down menu. For the purpose of this guide, we will be creating a time schedule.
- Click Save. Your newly name schedule will now appear below in a table.

Click image for large view
Adding Office Events
- To add an Office Event, click on the schedule you would like to use. This will generate two additional tables (a and b) below the main schedule table.
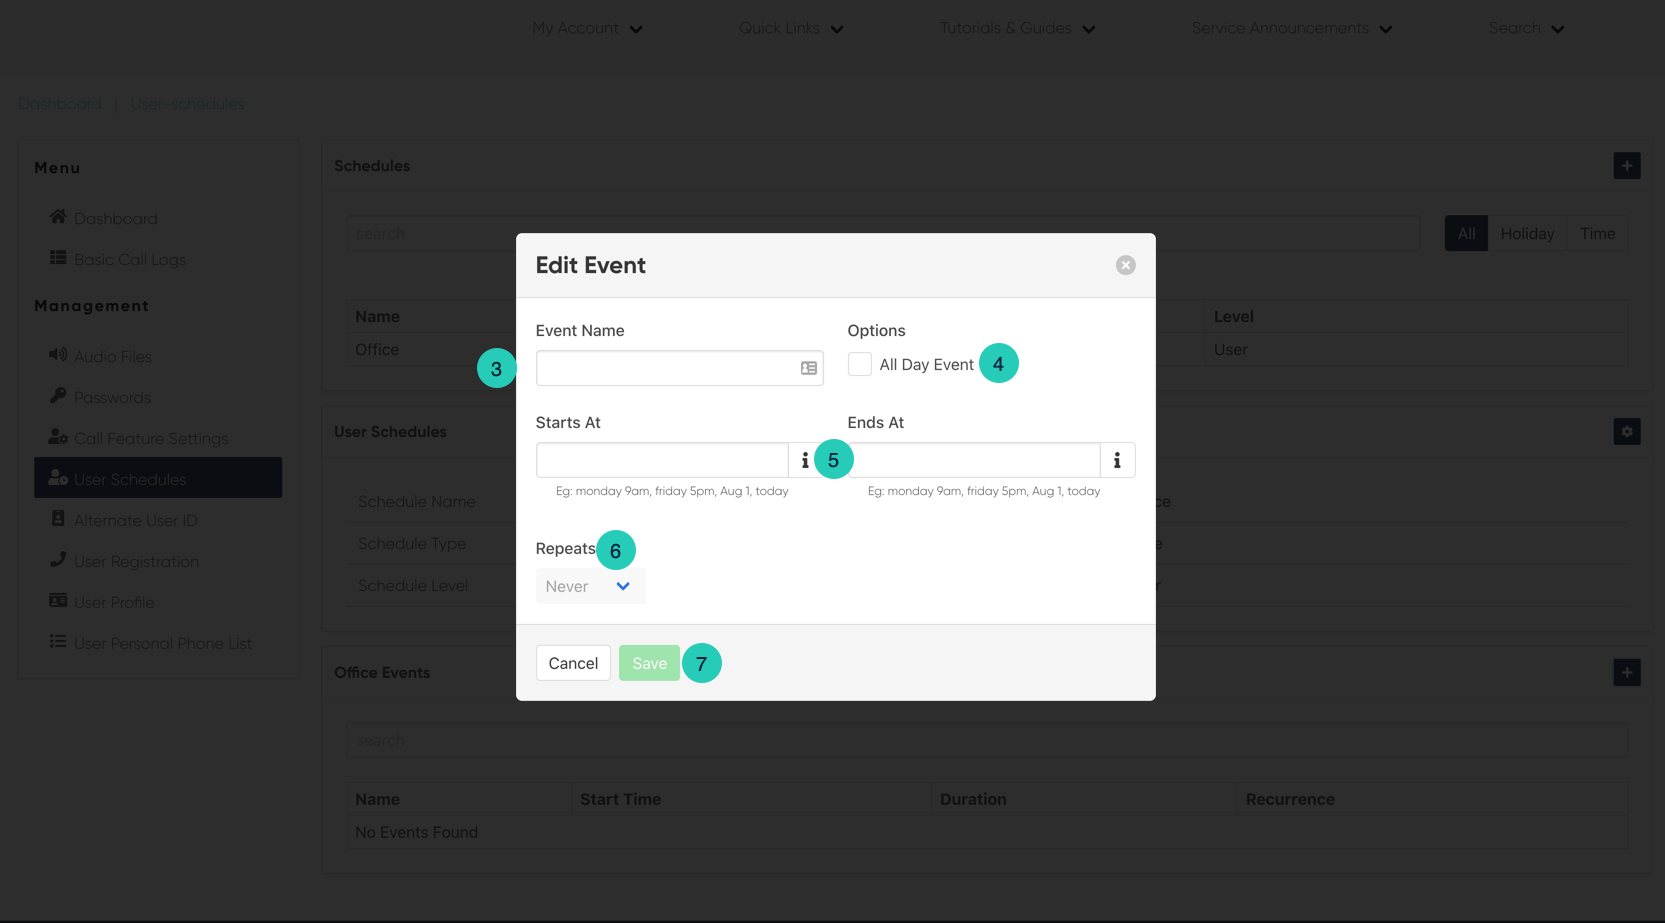
- Click on the Plus icon in the Office Events table. The Edit Event window will appear.
- Proceed to enter the Event name.
- Select whether it is an All Day Event or not. If it is, check the box to enable it.
- If it is not an All day event, add the “Start At” and “End At” time in the corresponding fields.
- Next, from the drop-down menu, select whether or not this office event will repeat or be a single event.
- When complete, click Save.
- Your Office Event will now be listed in the appropriate table.

Click image for large view
Click image for large view
Please Note: Enter the date and time in the following way: month day year time AM/PM. Use only spaces to separate each time item.